


Adding audio in an educational video is important can help your students to clearly understand what you are trying to teach. Sometimes, using text to explain what you are teaching is not enough. Talking allows you to explain things more clearly to the audience in the video. Videos that are quiet without any voice are boring. Even if the pictures in the video are not nice, a good quality audio in the video will be able to grab people’s attention.
If the audio quality is marred by background noises or it is too soft, you will find that your video gets very little viewing. With Movavi Video Editor, you can cut the parts of the audio that have a lot of background noises and rerecord that part. You can also increase the volume level of the voiceover if you find that you are speaking too softly.
Movavi Video Editor supports microphone voice input and can automatically detect a microphone that is plugged into the computer. To record a voiceover, you must click on the microphone button. The volume slider to the left of the microphone button can be toggled up and down to adjust the volume level of the microphone’s voice input. Finally, you must press the Start recording button to begin the recording. When you are done recording your voice, you can press the Stop recording button.
The recorded audio will be added onto the timeline and the destination folder. If you are not sure whether your microphone is detected, you can right click the volume icon on the task bar and go to recording devices. You will be able to see your microphone in the list if it is plugged in. If it is not active, you can right click on it and select enabled.
You can use the scissor tool to trim away the part of the audio clips that you feel are inappropriate for example background noises. Trimming empty spaces in the audio clips allow you to shorten the audio track so that it is smaller size. Using the scissor tool to trim off unwanted part in the audio is easy. You just select the unwanted part in the audio with the red marker and click on the scissor button to trim it. You can also merge audio files that are already on your computer to replace the deleted audio part.
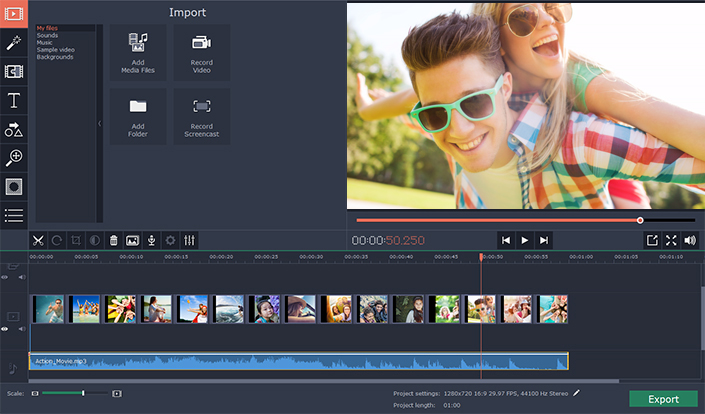
If you want to add audio to video that is already recorded, you simply click the Add Media Files button to load it onto the timeline. The audio track will be load onto the audio row in the timeline. The name of the audio file can be seen in the timeline.
You can add as many audio tracks as you want. The audio files you add will queue up one after another in the timeline. You can use your mouse cursor to drag the audio track to determine where it start or stop playing. You can play back the video while listening to the audio track to find out the best starting and end point.