
SATA( Serial Advanced Technology Attachment) drives stepped in the ring to replace traditional IDE(Integrated Drive Electronics) and Parallel ATA(Enhanced IDE). SATA directly connects with each drive that help it in eliminating the master-slave relationship between parallel hard drives. The speed of data transfer ranges from 150 megabytes/seconds up to 300 megabytes/seconds. Length of interface cable of SATA can be a metre long, which is quite beneficial in the case of large computers.
Ready for hard drive upgradation? But before that, there are several things listed below you must consider before installing your SATA drive.
Guidelines to Safety
There are several guidelines that need to be considered to avoid any mishap while installing a hard drive on your computer.
Ground Yourself
Try to ground yourself, to avoid any damage from electrostatic discharge(Discharging the static electricity of your body before opening your computer case). For this purpose, hold a grounded and solid piece of metal, for instance, the metal case of your computer or the leg of a chair.
Turning Down the Power:
Before opening the case of your computer and grounding yourself, don’t forget to turn down your computer.Following that turn off the Windows and your computer through the rocker switch. An alternative option could be unplugging the power cord.
Connector On Motherboard:
If you’re having an old model of computer, it would have had arrived with the traditional Integrated Drive Electronics(IDE) which does not provide a SATA Connector. Have a look in your computer case to find out the same.
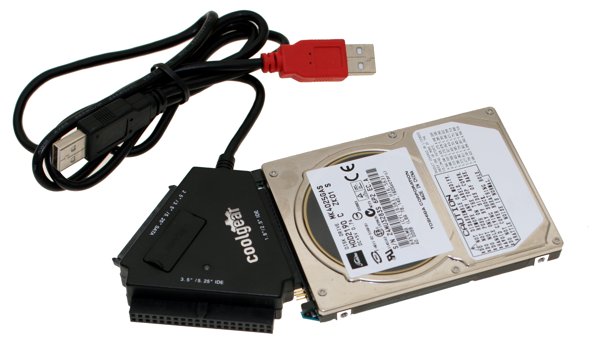
Firstly, look at your interface cable to get information about the current hard drive that your computer possesses. Following images can help you in identifying IDE(left, grey) and SATA(red, right) cables
Search for a SATA connector on the motherboard, if your computer has an IDE. And if your old hard drive has a SATA, then check whether there is an additional SATA connector on your motherboard, just in case you want to keep the old one. Following image shows a motherboard having two SATA connectors(purple)
Don’t forget the Cables:
Make certain that you have all the cables that are required, i.e., SATA interface cable and either a SATA power cable or a 4-pin Molex power connector.
Serial Advanced Technology Attachment(SATA) drives are arriving with two types of power connectors, namely Molex and the SATA power connector.
There is a need of considering some important points. You must select only one of the above-listed power connectors for each SATA drive( either a SATA power connector or a 4pin Molex). Keep in mind one thing, not to connect both of the connectors at the same time. Otherwise, you could be inviting an unwanted potential damage to your drive.
Process of Installation:
As far as the installation process is concerned installing SATA is same as that of its predecessor IDE. This video on YouTube clearly shows how to install an IDE drive.
Configuring the BIOS
BIOS Configuration:
In case your computer, by default, is not able to detect the new hard drive, you affix this in BIOS(Basic Input/ Output System). For launching the BIOS Start by pressing F1, ESC, or DEL key before the system boots into the window.
You might not have to make any changes to the BIOS. However, if your computer doesn’t detect the new hard drive by default, you may be able to fix this in the BIOS. Since BIOS options are not standardized, I can only give you a vague guideline here.
After entering into the BIOS, find an option for auto-detecting new hardware. If you are making use of SATA host adapter, the hard drive would be showing as an SCSI device. Make sure to save the changes you have made, before making an exit from BIOS.
It is not rocket science as I said! So let’s roll!