
If you have a home with wall-to-wall carpet in every room, you cannot avoid the task of patching a carpet. Why? Spills, cigarette burns and other mishaps can ruin a small area of wall to wall carpeting, making it necessary to remove the section as a way to repair the damage.
While you can always call carpet patching service Toronto, the task is not that difficult, given that you have a time and tools. And of course, DIY carpet patching is good for small patches, but if you need to check all the carpets in the house for patching, better call experts to perform it better and quick.
If you’ve made up your mind to take matters in your hands, Dr Carpet Toronto has few important information to share.
- Measure the damaged area on the carpet: Use the tape measure to identify the size of the patch that will be extracted from the surrounding carpet. This will make it easier to cut a replacement patch to size.
- Put Duct Tape around the Damaged Area: Use duct tape to outline the section that is to be removed. Check the position of the tape with the measurements taken previously to make sure the inside edge of the tape matches those dimensions. Try farming the replacement carpet from an inconspicuous area, such as inside a closet or underneath a bed. Be sure that the place you farm the replacement carpet from isn’t going to be visible.
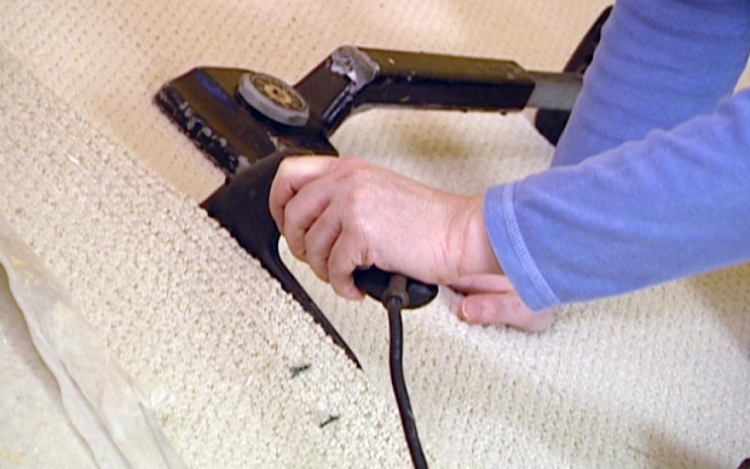
- Remove the Damaged Section: You can use a utility knife, but carpet patching companies Toronto would advise you to use a carpet cutting tool to gently cut along the inside edge of the duct tape. Apply just enough pressure to cut through both the surface of the carpet and the backing, but not enough to damage the underlying layer of padding. Once the section is completely cut, lift it off the carpet surface.
- Cut The Replacement Patch Accurately: Turn a carpet remnant face down and measure a patch for the carpeting, using the measurements obtained earlier as a guideline. Mark the lines of the patch with the pencil, and then use a utility knife or carpet cutter to cut out the patch.
- Prepare The Carpet: Neutralize the disk temporarily by putting a small amount of water on it. Lift the edges of the carpeting around the hole and slide the adhesive disk underneath, with the adhesive side facing upward.
- Move the Patch into the Position: Groom away any loose carpet fibers from the edge of the hole. Put down a thin layer of carpet glue along the edges of the adhesive disk. Place the patch into the hole, taking care to make sure the fit is snug and even. Press lightly to allow the backing on the patch to come into contact with the underlying tape and adhere properly.
- Hide the Seams: Depending on the type of pile, this may be accomplished by brushing the fingers around the perimeter of the patch, or using a carpet brush to train the pile on the patch to move in the same direction as the rest of the carpeting pile.